Repositories
Create a Repository
You can add a new repo from the sidebar or the repos list of the group.

You will be redirected to the repository form.
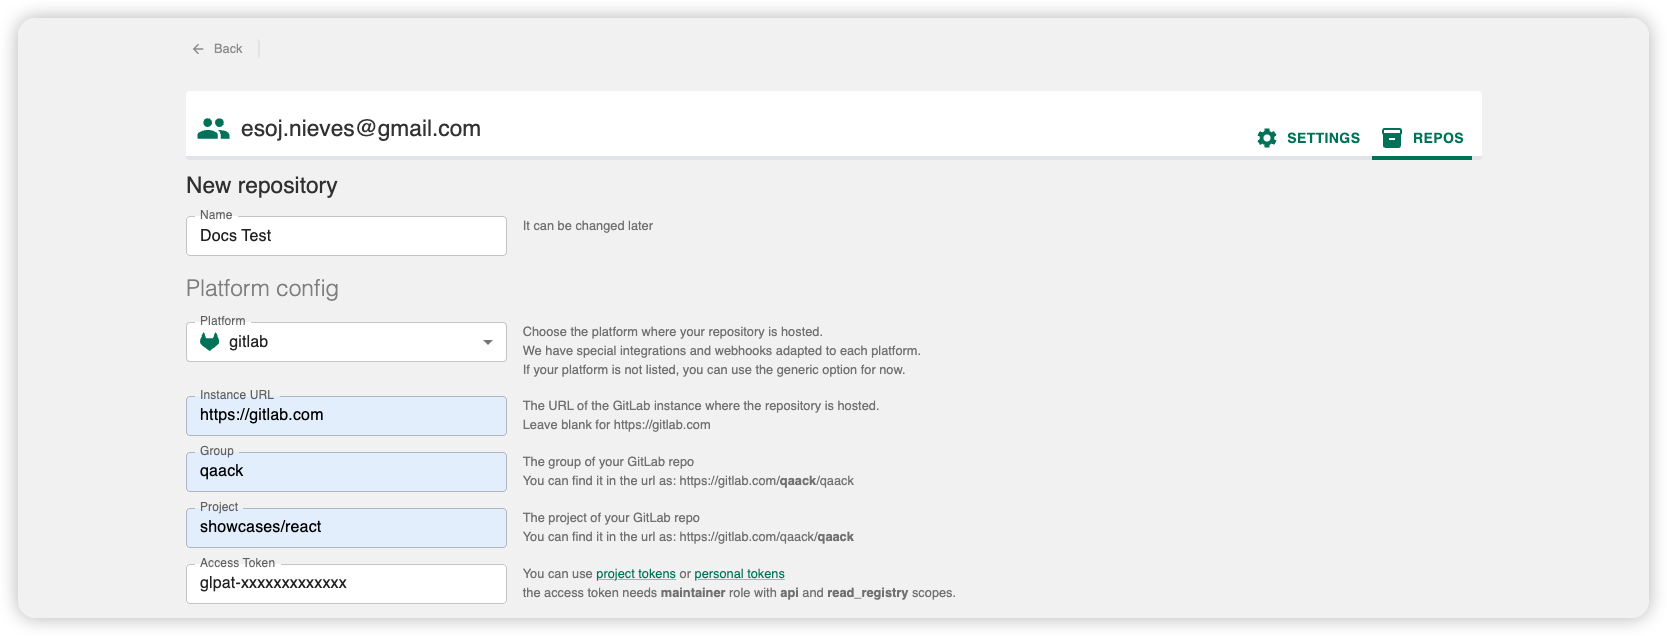
Select the name of the repo
Select the git hosting platform

- Decide the source of your qaack configuration file. That file will be used to build the web environments of your repo.
You can select “repo” as the source, in that case the file will be taken from the repo on the route .qaack/qaack.yml.
You can also select “panel” as the source, in that case you will have to introduce the configuration file in the form. (You can change it later)
If you select “both” the file will be taken from the repo and if it’s not present, it will be taken from the panel.
Provide your config file, you can see details about the format of the qaack configuration file here
Repository Settings
Once the repo is added you can see it in the repos list. Select it and go to the details, then press on the settings tab.
Here you can configure multiple features that will be taken into account when building the environments of the specific repo.
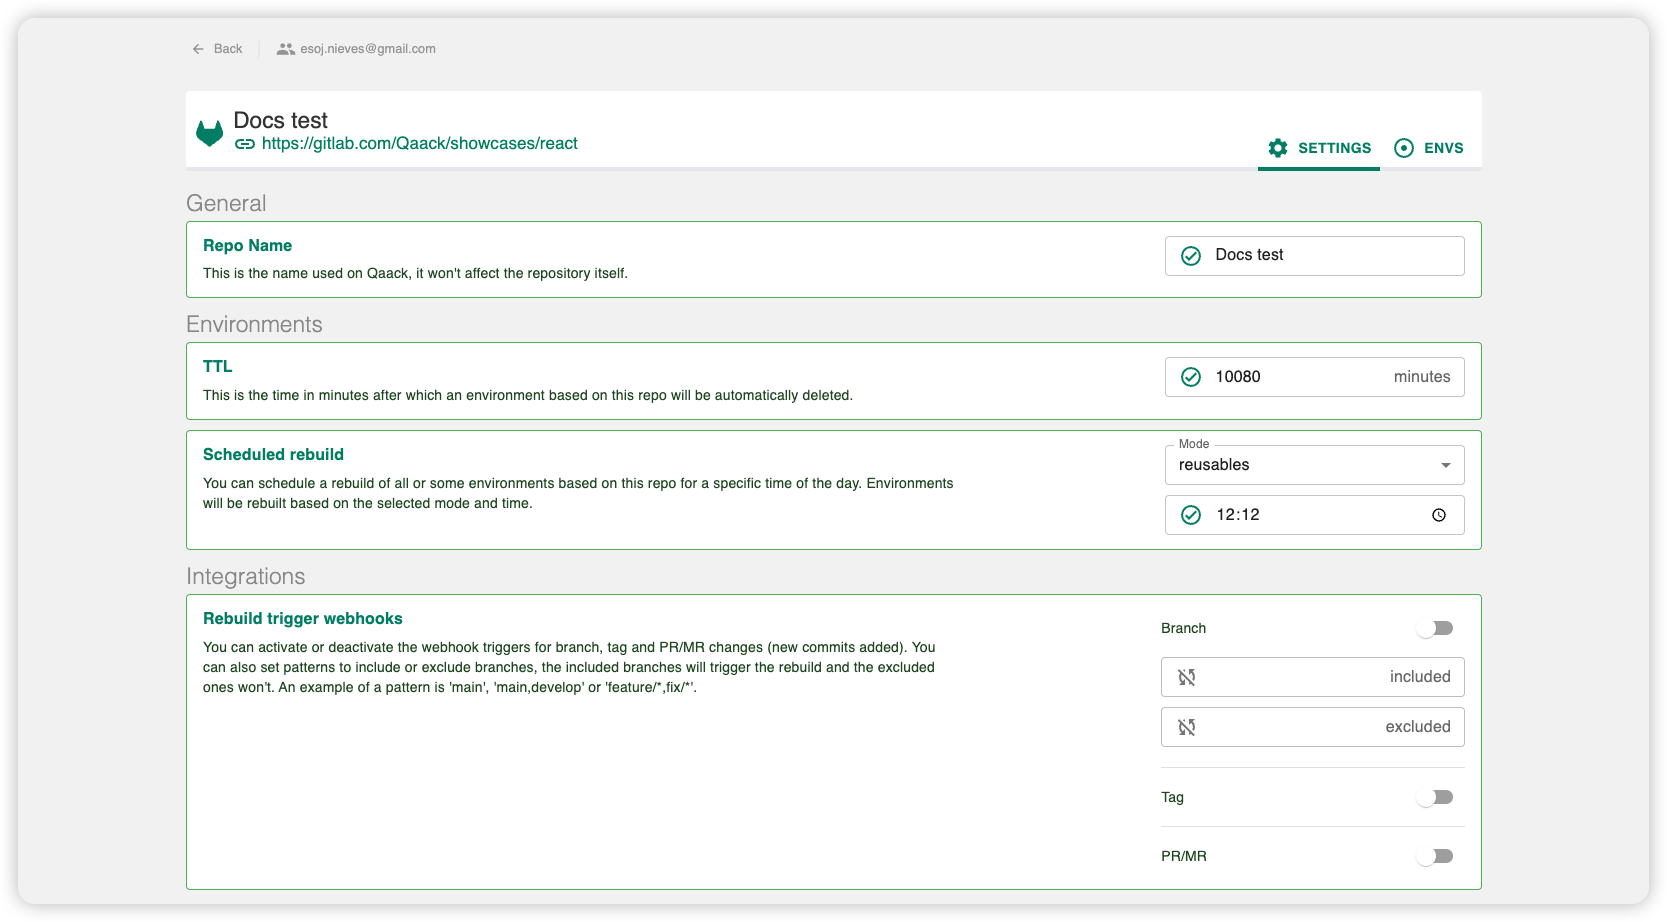
Change the name of the repo
Change the TTL (Time to live) of the environments of the repo, they will be automatically deleted after the specified time.
Change integrated triggers from your git platform that will trigger the rebuild of the environments.
Schedule the rebuild of the environments on a specific time.
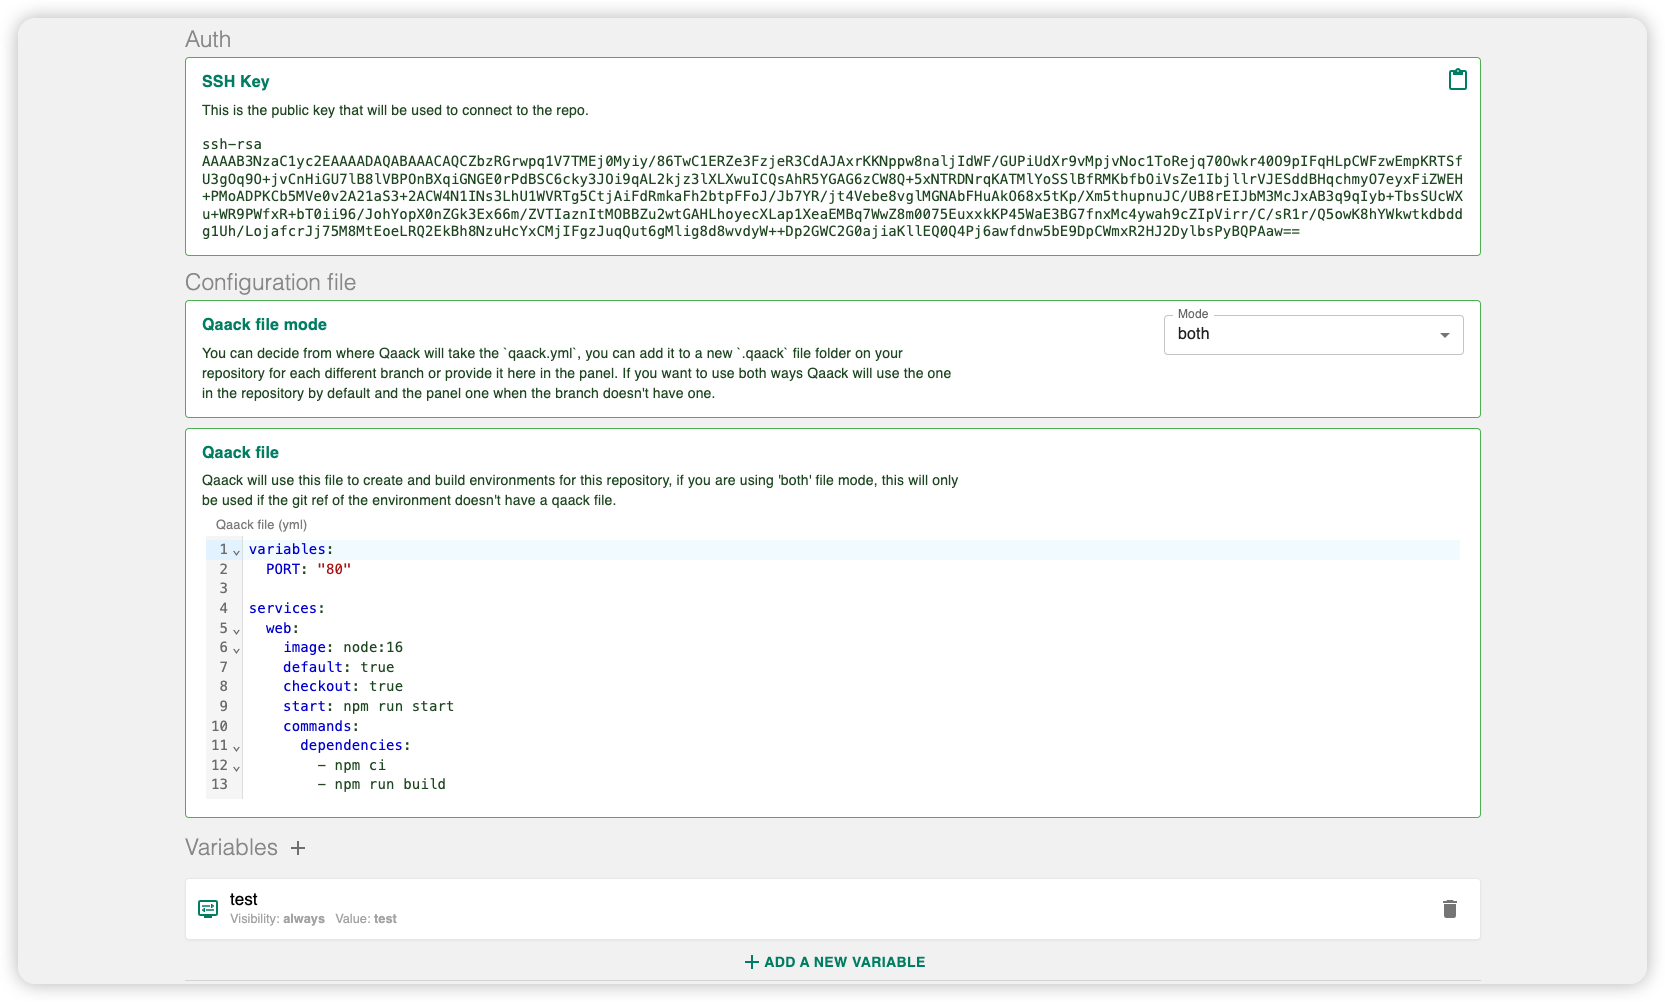
Check the ssh key used by Qaack for the repo.
Update the configuration file anytime.
Add variables for the building process of the environments.
Repository environments
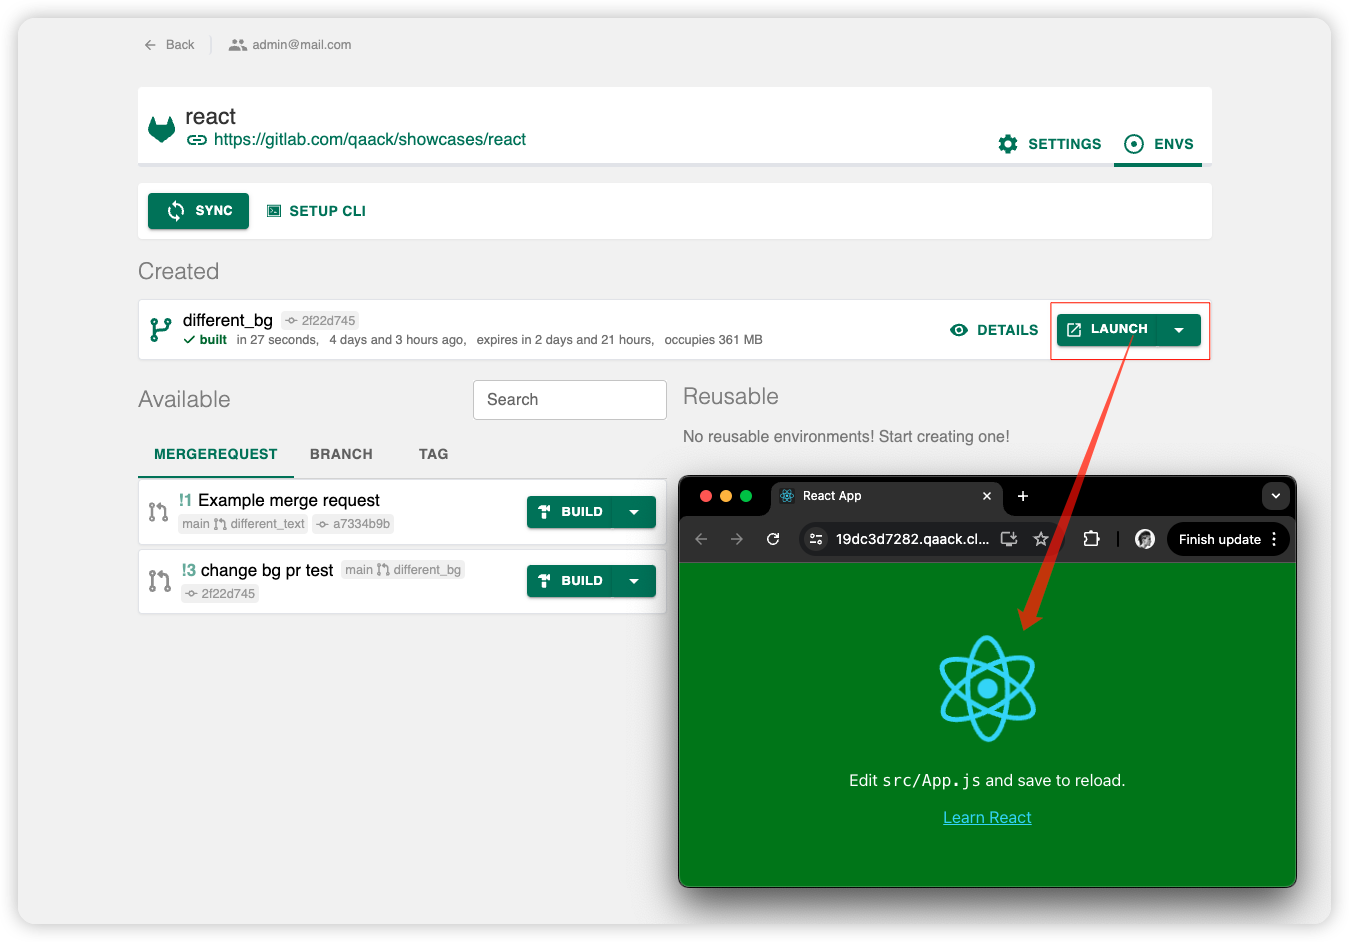
Go to the envs tab on the repo details page.
Here, you can sync the git refs (branches, tags and PR/MRs) of the repo with Qaack. They will appear as available environments in the envs list. You can build them quickly with the build button.
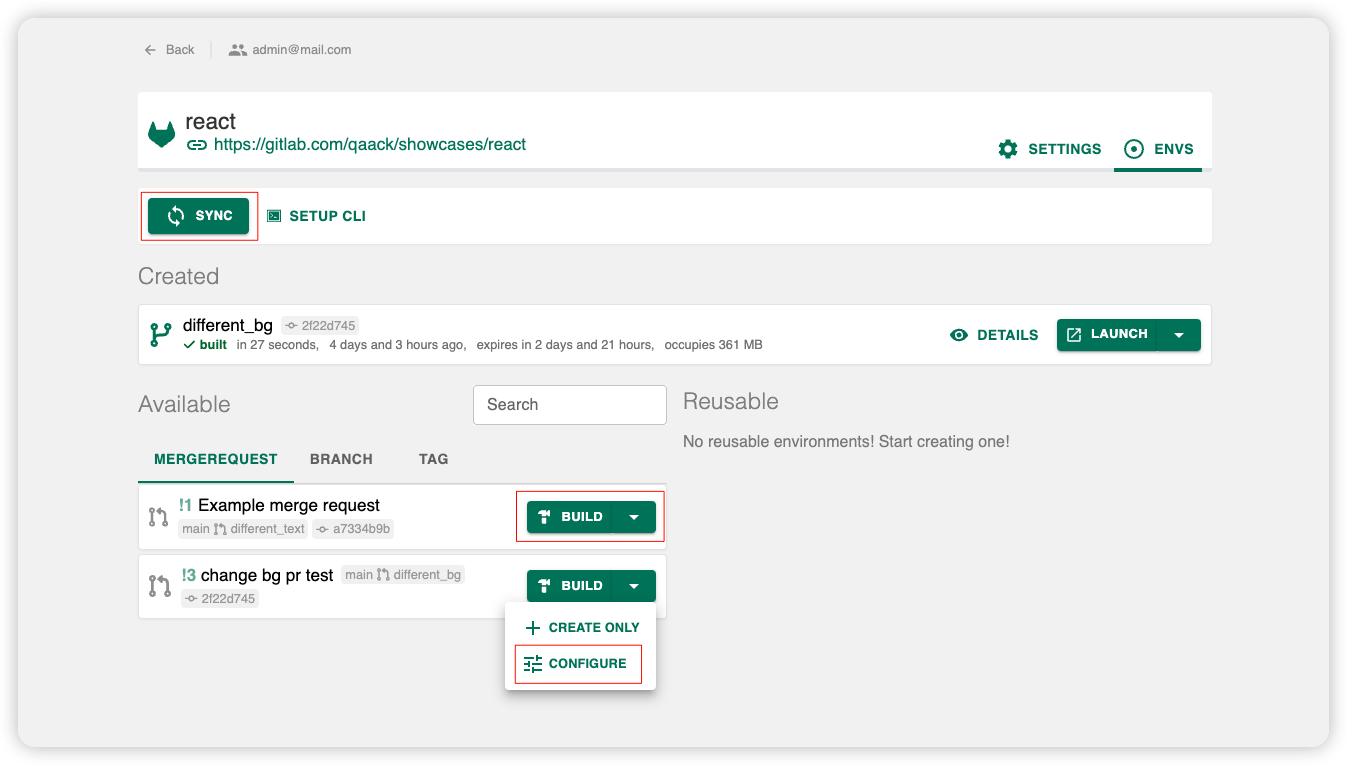
You can also configure the build settings before building the env.
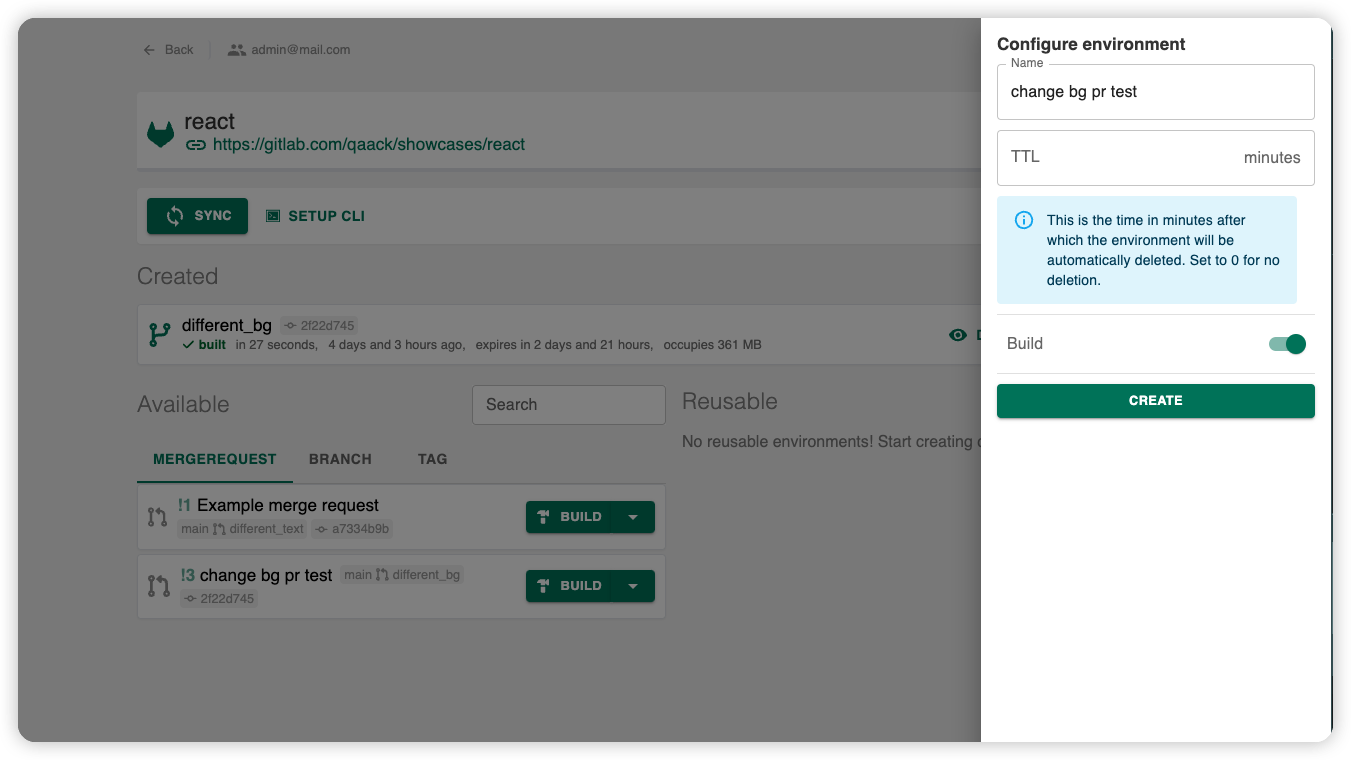
Once an env is built you can launch it and start testing your code.
